Creating a New User
-
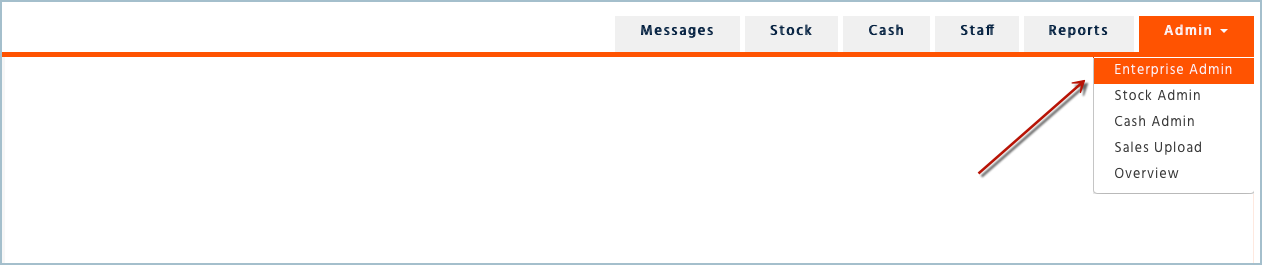
Log into the enterprise portal and go to Admin – Enterprise Admin
-
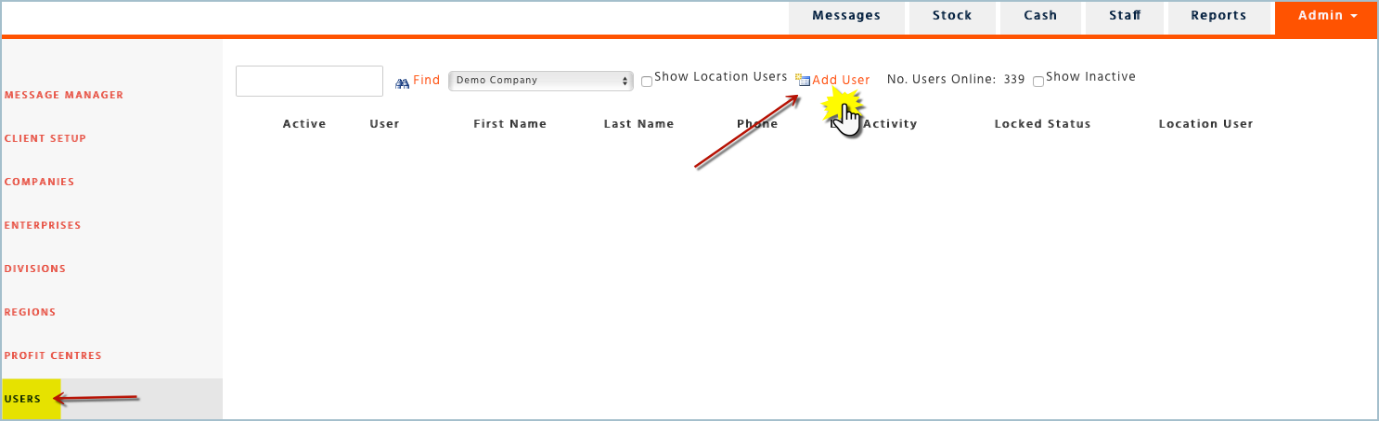
Select the company that the user belongs to
-
Select “Add User”
-
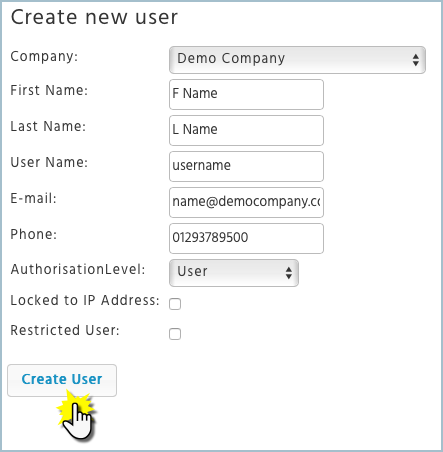
Enter in the required information for the new user. Username and Email address are mandatory fields
-
Authorisation Level – This is used as part of a process to enable users to authorise orders. If you are using our ‘Regions’ function to enable area managers to authorise orders, then the authorisation level can be set to ‘Area Manager’. If not, then ignore all other levels and just set as ‘User’
-
Locked to IP Address – An IP Address of the back-office PC can be entered onto the Profit Centre page and then when the ‘Locked to IP Address’ is ticked this will ensure that the user can only log into the Enterprise from that particular location. Leaving this unticked will mean the user can log into the Enterprise from anywhere
-
Restricted User – Please ignore, this is no longer used
-
Once all information is entered click on ‘Create User’
Assigning User Access Groups
-
Under Users, click on User Access Groups. These are the active restaurants that can be assigned to a user
-
You will be able to assign the Access Groups or relevant restaurants to the user by highlighting the correct group in the box on the left and clicking on the forward-facing arrow. This will move the selected group to the right
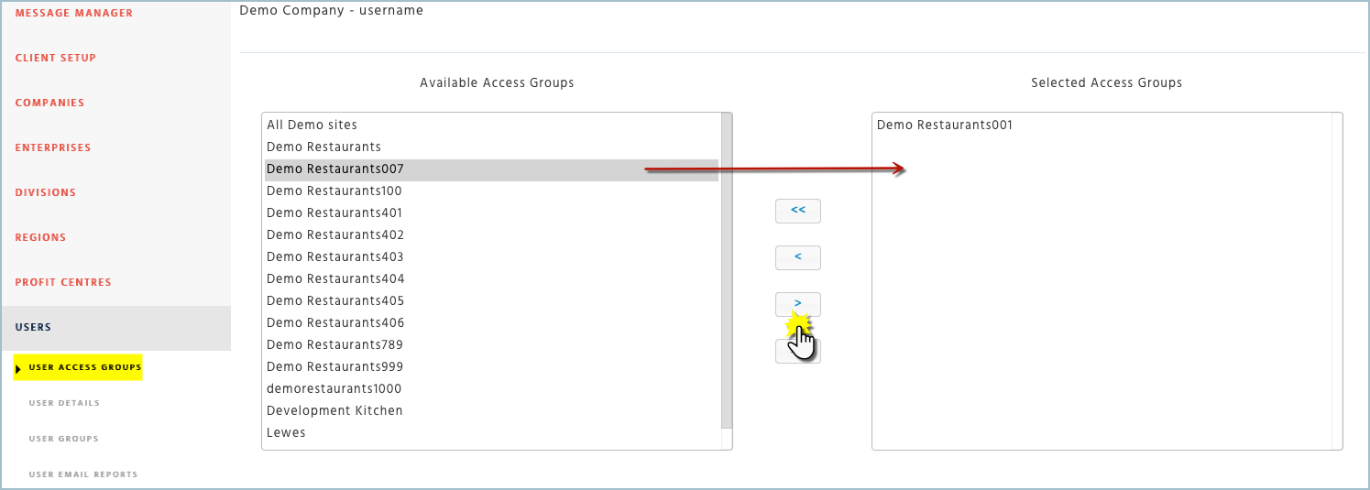
If the user has access to all the groups you can click on the double forward facing arrow and it will move all of the groups to the box on the right.
Assigning User Groups
-
Under Users, click on User Groups. These are the permissions that can be assigned to the user
-
You will be able to assign the User Groups or permissions to the user by highlighting the correct group in the box on the left and clicking on the forward-facing arrow. This will move the selected group to the right
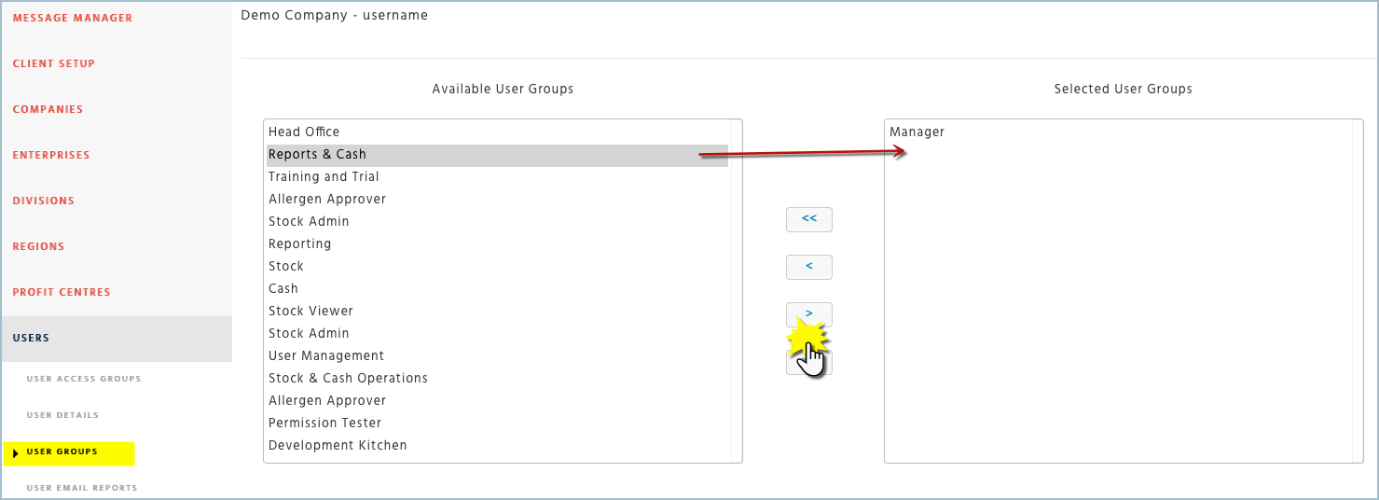
If the user has access to all the groups you can click on the double forward facing arrow and it will move all of the groups to the box on the right
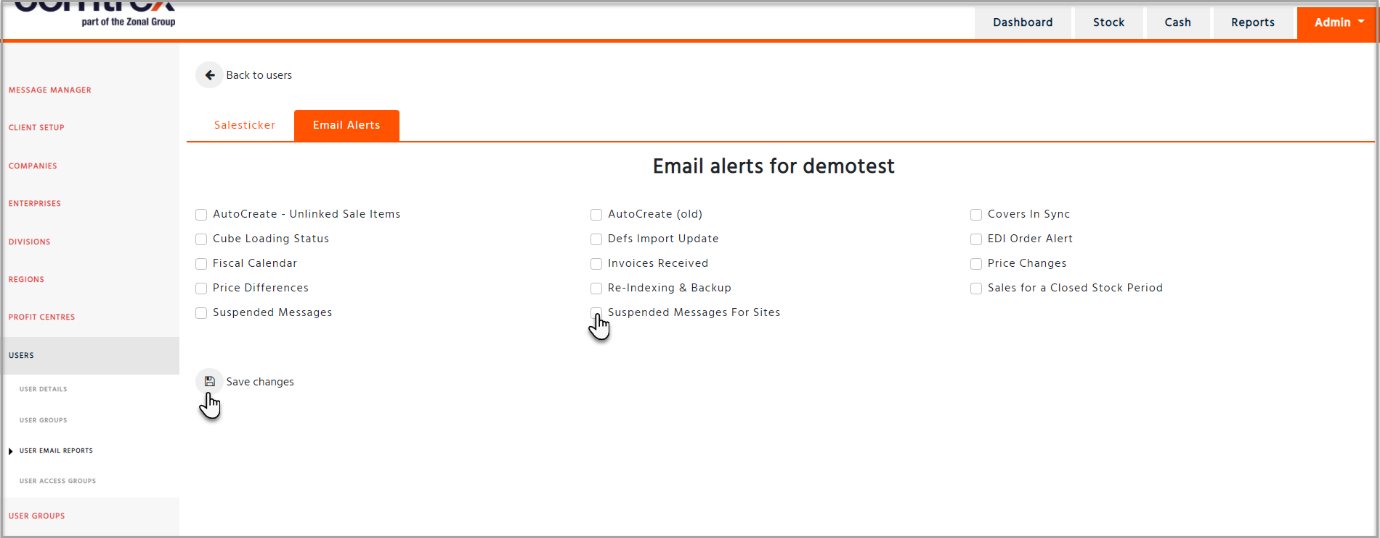
Assigning Salesticker Reports and Email Alerts
-
Under Users, click on ‘User Email Reports’ then ‘Salesticker’ tab.
-
Select the relevant reports and ‘Save Changes’. The user will then be able to select these reports to email to themselves when logged into the ‘Salesticker’

-
Click on the ‘Email Alerts’ tab and select the relevant alerts to be sent to the user from the system
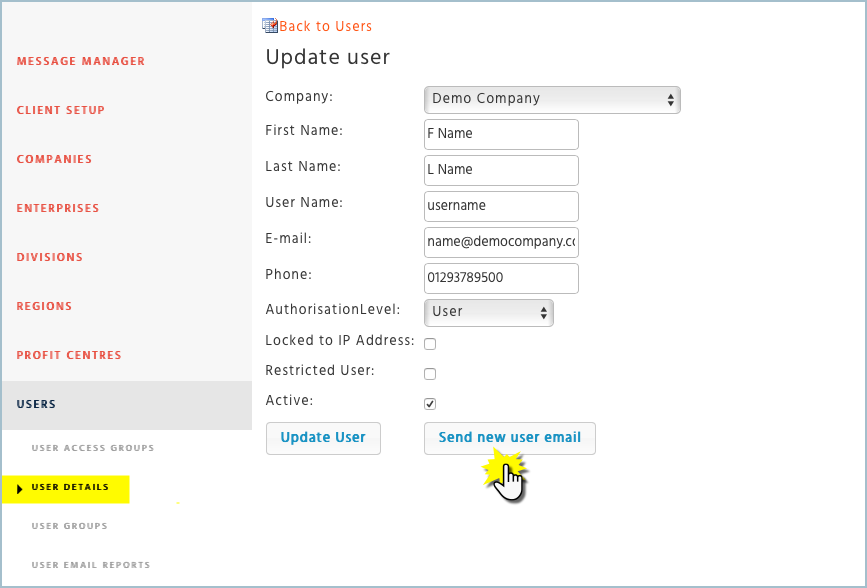
New User Password setup
Once the user has been created, you will then be able to send the new user an email with a link to set up their own password. We no longer set up passwords on behalf of users.
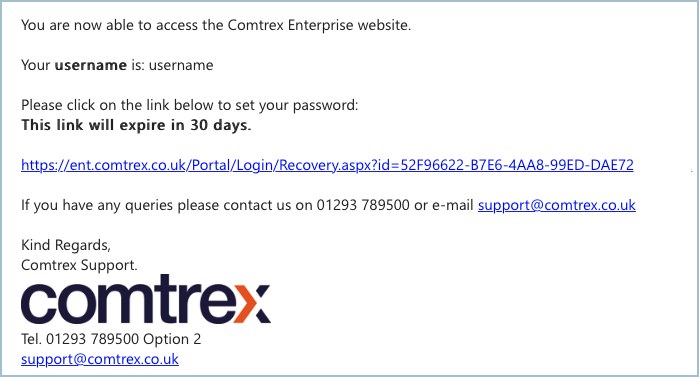
The user will receive an email and have 30 days until the link expires. Once the user has clicked on the link from the email they will be directed to the Enterprise website, where they can enter their new password.
Resetting a User’s Password
If a user has forgotten their username or password you will be able to send them a prompt to refresh their memory or to create a new password.
-
Select Enterprise Admin
-
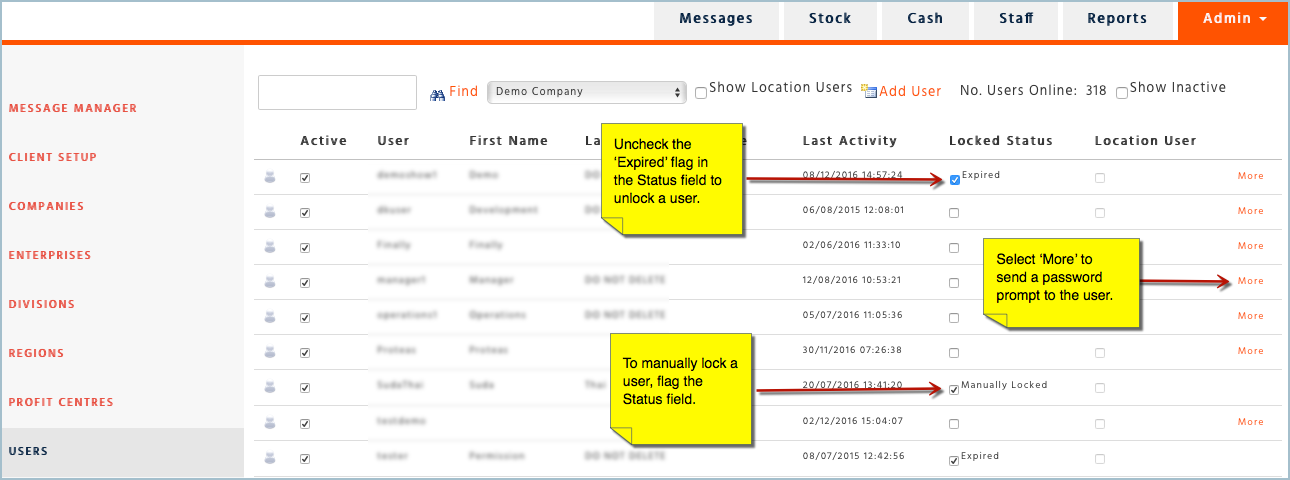
Search for the user and select ‘More’. If the ‘Locked Status’ column box has a tick with ‘Expired’ next to it this means they have not logged in for more than 30 days. Untick the box and this will re-activate the account and the ‘More’ option will become available
-
If you want to quickly restrict a user from logging in at any time, you can tick the ‘Locked Status’ box and this will block the user. If you untick the box this will re-activate the account
-
Once you are in the user’s details page. You will have 2 options.
-
Update User - once you have amended the user’s details select “Update User” this will save the changes
-
Send Password Prompt
-
Click on “Send Password Prompt” to send the change password link to the users email address
-
You may need to ask them to check their inbox or Junk folder if they have not set you as a safe sender
-
Once they have received the email, inform them to click on the link which will allow them to reset their password
-
This Link is only valid for 30 mins. If they do not use it within 30 minutes the link will expire and you will need to send another password prompt email
Forgotten Password
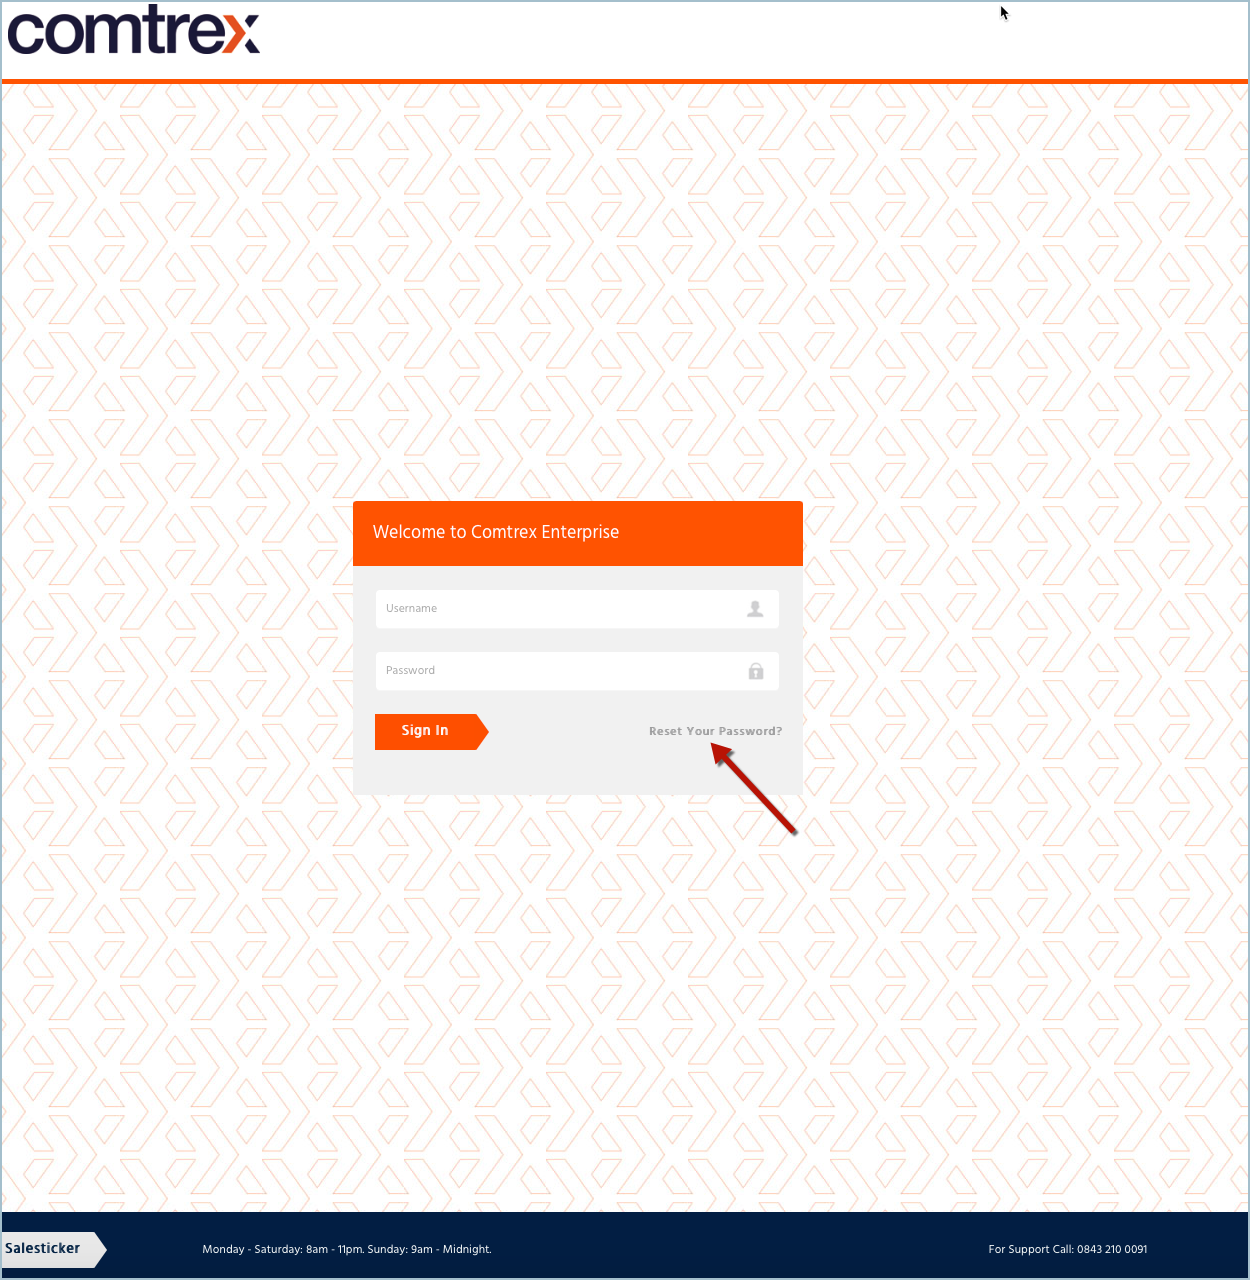
The same process can be followed if a user has been locked out of the website (i.e their access has expired)
Once in the login page – click on “Reset Your Password”
-
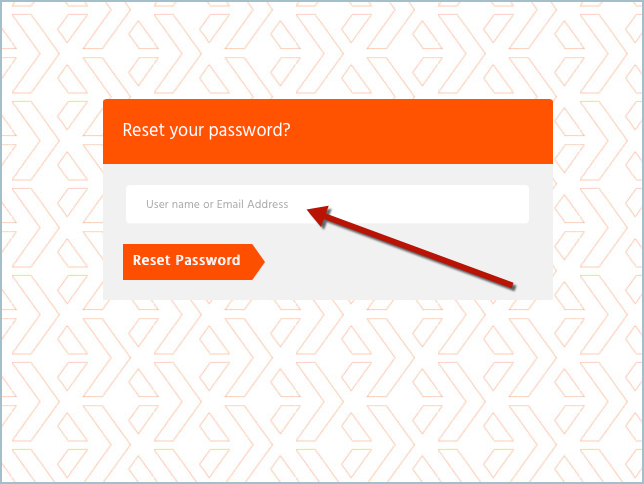
Enter your username or email address
-
You will then receive confirmation that a recovery email has been sent to your registered email address
-
You will need to check your inbox for this email. Please note that you may need to check your Junk Mail folder if it is not received in your inbox
-
Click on the link within the email as instructed
-
As prompted, please enter your new password and select “Submit” you will need to do this within 30mins otherwise the link will expire and you will need to repeat the process
-
If your password change was successful you will then automatically be logged into the Enterprise website
Maintaining your Users
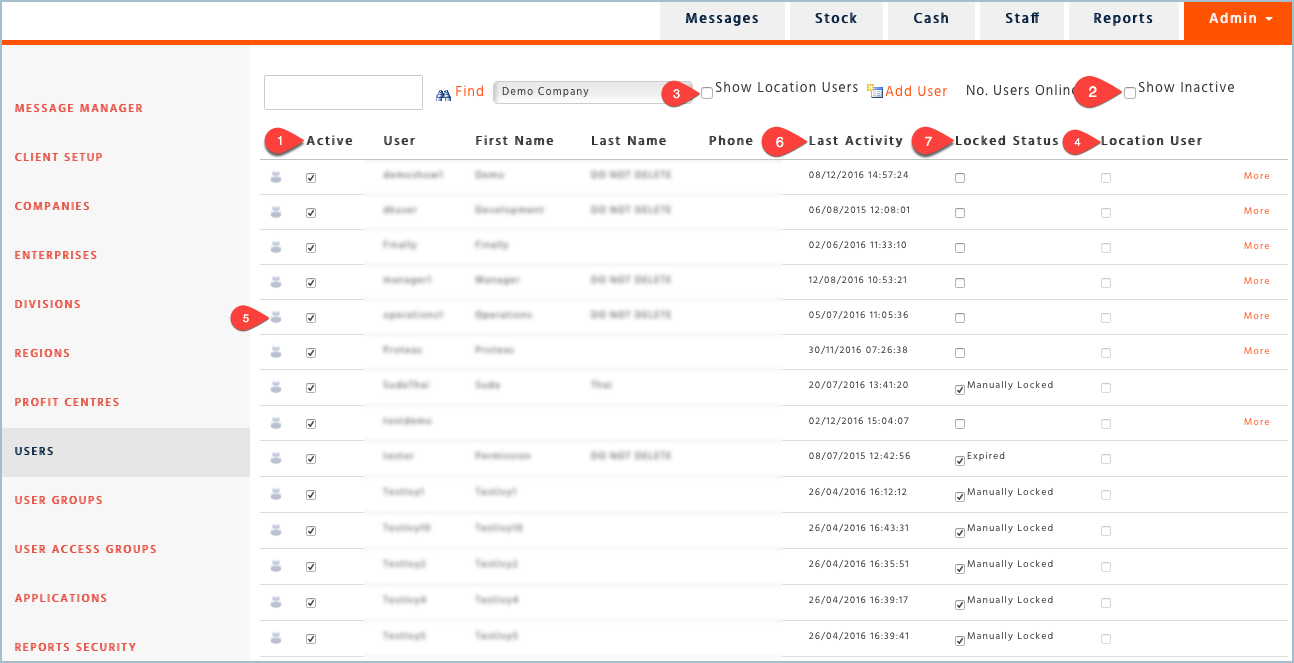
The users list will show you the following:
-
Active: This will show you If the user is active or not. Here you can make the user inactive – if you make a user inactive it will mean that they will no longer be able to access the website or Sales Ticker. Use this option if the employee leaves the company
-
Show Inactive: If you would like to look for users that have been made inactive. You will then be able to make the user active again if you wish
-
Show Location users: Location users are those users that are locked to an IP address (most commonly the actual site) to view these users select this flag
-
Location users: This flag will be selected if the user is a locked to an IP address
-
Online: This icon will be displayed in blue if the user is currently using the site. (this updates every 15 minutes)
-
Last Activity: This shows you when the user last logged into the website
-
Locked Status: This shows if the user is manually locked or expired. Expired status will show if the user hasn’t logged into the site within 30 days